
Initial Set-Up And Use:
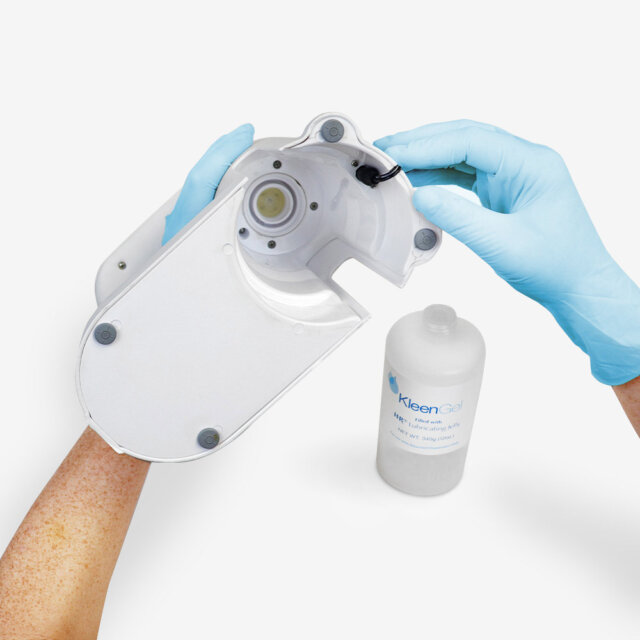
Attach The Power Cord: Lift dispenser to access bottom of the device and remove the empty cartridge that was shipped with your new device. Plug the DC cord into the port and then thread cord through the notch as shown. Replace KleenGel to its upright position and plug the other end of the power cord into electrical outlet.
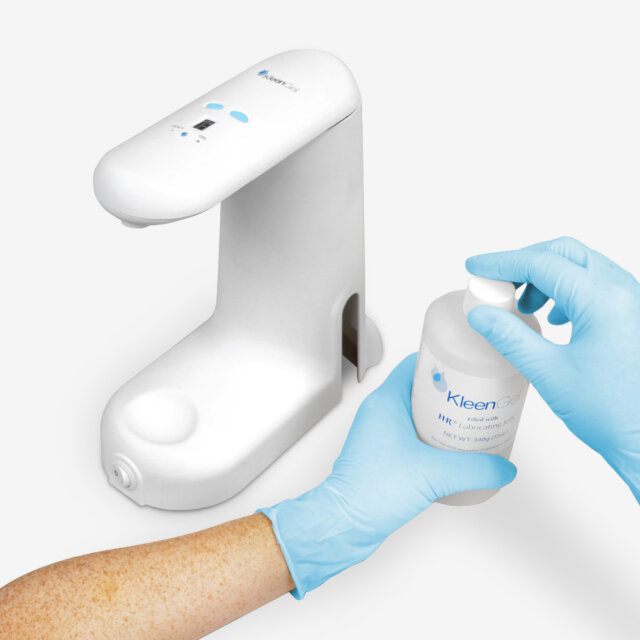
Prep The Gel Cartridge: Remove twist cap and foil seal. Remove the straw fitment from its packaging and then insert into gel cartridge until it’s seated and flush with the opening.
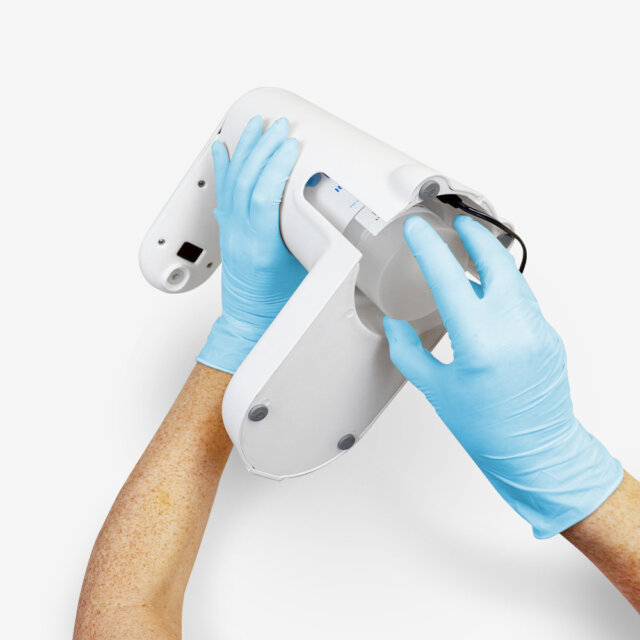
Insert The Gel Cartridge: Lift dispenser exposing base, insert gel cartridge into chamber (as shown here) and turn clockwise being careful not to overtighten. Replace to upright position.
Power Cord And Gel Cartridge
-
Attach The Power Cord: Lift dispenser to access bottom of the device and remove the empty cartridge that was shipped with your new device. Plug the DC cord into the port and then thread cord through the notch as shown. Replace KleenGel to its upright position and plug the other end of the power cord into electrical outlet.
-
Prep The Gel Cartridge: Remove twist cap and foil seal. Remove the straw fitment from its packaging and then insert into gel cartridge until it’s seated and flush with the opening.
-
Insert The Gel Cartridge: Lift dispenser exposing base, insert gel cartridge into chamber (as shown here) and turn clockwise being careful not to overtighten. Replace to upright position.

Turn On: Ensure the device is plugged in and then switch the Power On/Off to the On position.
Priming The Dispenser: Your new dispenser is set to a dispensing volume of 5 ml. This aids in the speed of priming your new device. Priming will ensure a smooth flow of gel as well clearing any sterile test gel used in our QA process. Priming may take 1 – 2 dispenses of sterile gel. Priming is only required for a new device and when using your first gel cartridge.
Priming A New Dispenser
-
Turn On: Ensure the device is plugged in and then switch the Power On/Off to the On position.
-
Priming The Dispenser: Your new dispenser is set to a dispensing volume of 5 ml. This aids in the speed of priming your new device. Priming will ensure a smooth flow of gel as well clearing any sterile test gel used in our QA process. Priming may take 1 – 2 dispenses of sterile gel. Priming is only required for a new device and when using your first gel cartridge.
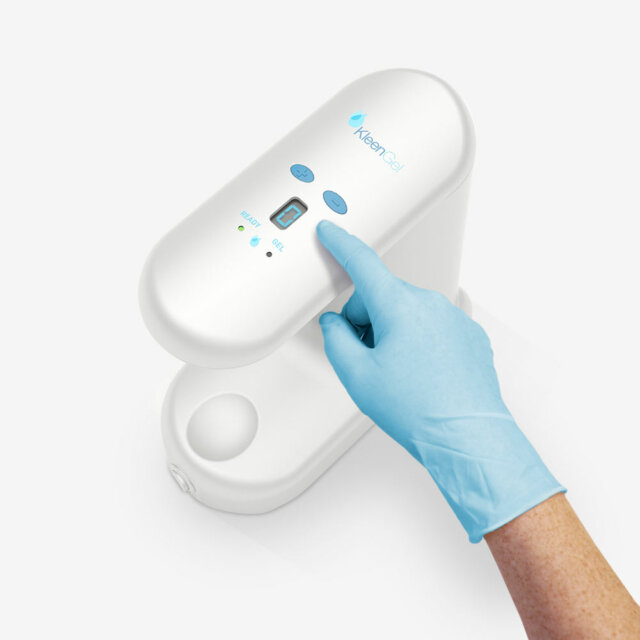
Select Desired Dispensing Volume: Use the +/- buttons to adjust the setting to your preferred dispensing volume (between 1 – 9 ml). When the device is turned off and back on again the KleenGel will default to the last dispensing volume used. See FAQs below for dispensing volume suggestions.
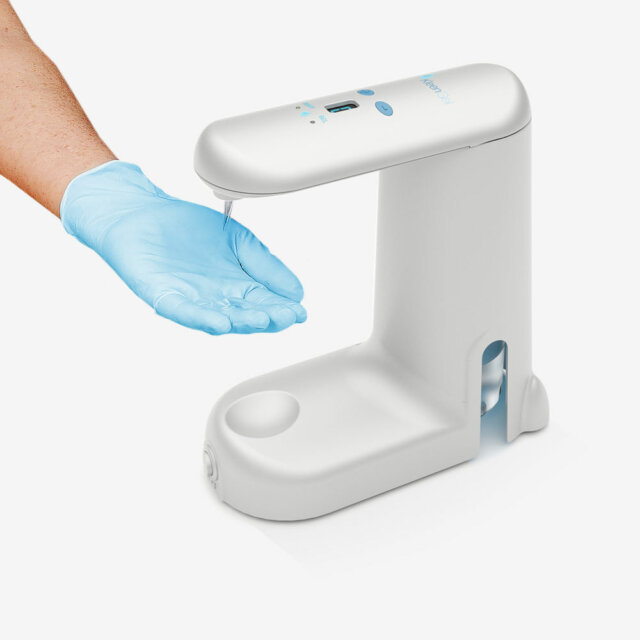
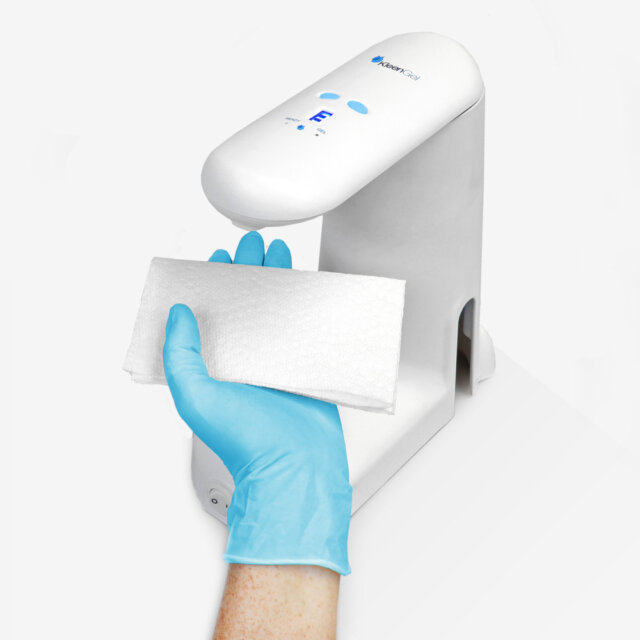
Dispense Sterile Gel: Place your gloved hand or instrument under the dispense spout positioned where you would like to receive gel. The infra-red sensor located just behind the dispensing spout will sense the instrument or hand and dispense the volume of gel selected.
Using The Dispenser
-
Select Desired Dispensing Volume: Use the +/- buttons to adjust the setting to your preferred dispensing volume (between 1 – 9 ml). When the device is turned off and back on again the KleenGel will default to the last dispensing volume used. See FAQs below for dispensing volume suggestions.
-
Dispense Sterile Gel: Place your gloved hand or instrument under the dispense spout positioned where you would like to receive gel. The infra-red sensor located just behind the dispensing spout will sense the instrument or hand and dispense the volume of gel selected.